
Introduction
When you are writing tests, the name of the test is very important because the person who is executing the test should be able to detect what was fine or wrong at a glance. For this reason, it is a good practice to follow the convention format:
TestedMethodName_InputData_ExpectedResult
By using this format, we can see in a line the method to test, the input used and the result expected, so it will be easy to identify what was wrong.
Another good practice is following the “Arrange”, “Act”, “Assert” convention (http://wiki.c2.com/?ArrangeActAssert), so when we are reading a test, we can identify easily each part of the test. To make more visible each part, unit test usually include one comment per each state of the test.
Finally, if you are using different test categories, for example to classify unit tests and integration tests, you should use the word TestCategory(“YourCategory”) in your metadata definition.
Using the snippet
In order to write faster unit tests with this format, I created this snippet which allow you to write the skeleton of a test with by using a shortcut.
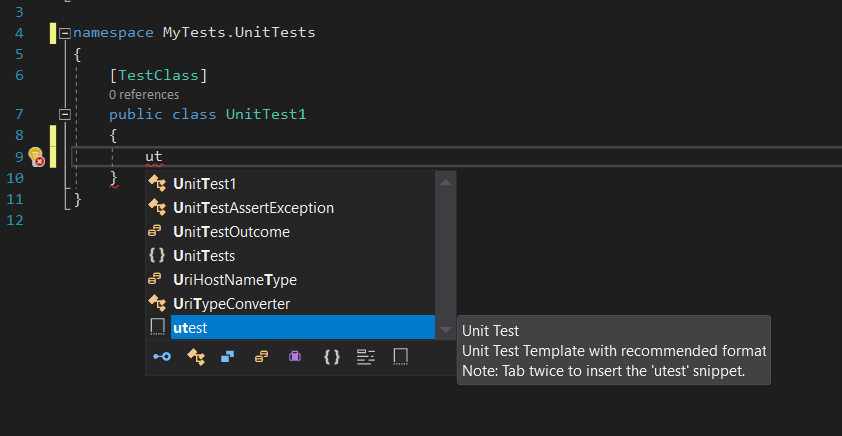
First we can see the results. When we write “utest” we want our snippet to show up with a description.
If we type double TAB, the snippet completes the skeleton of a unit test with the skeleton, the test name with the three parts of the test and the body of the test with the three steps of the test. In addition, when you are writing the name of the test, you can tabulate through the 3 parts. When you press intro, the cursor will go to the after the “Arrange” step.

Writing the snippet
Code snippets are XML language. I we analyse the snippet for unit tests, we can see two parts: the Header and the Snippet. You can download the complete snippet from my GitHub:
https://github.com/albertocorrales/unittestsnippet/blob/master/unittest.snippet
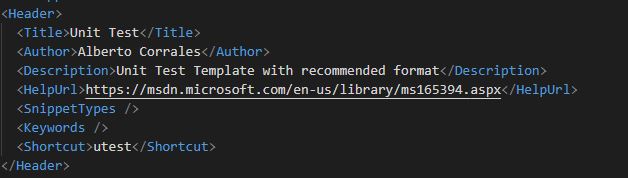
In the Header part, we fill some information about the snippet. The most important part is the Shortcut. In this example I chose “utest” to make the snippet show up. If you are using Resharper, you might either need to switch back to Visual Studio Intellisense in Resharper’s options or use Ctrl+K, X to bring up the snippet menu.
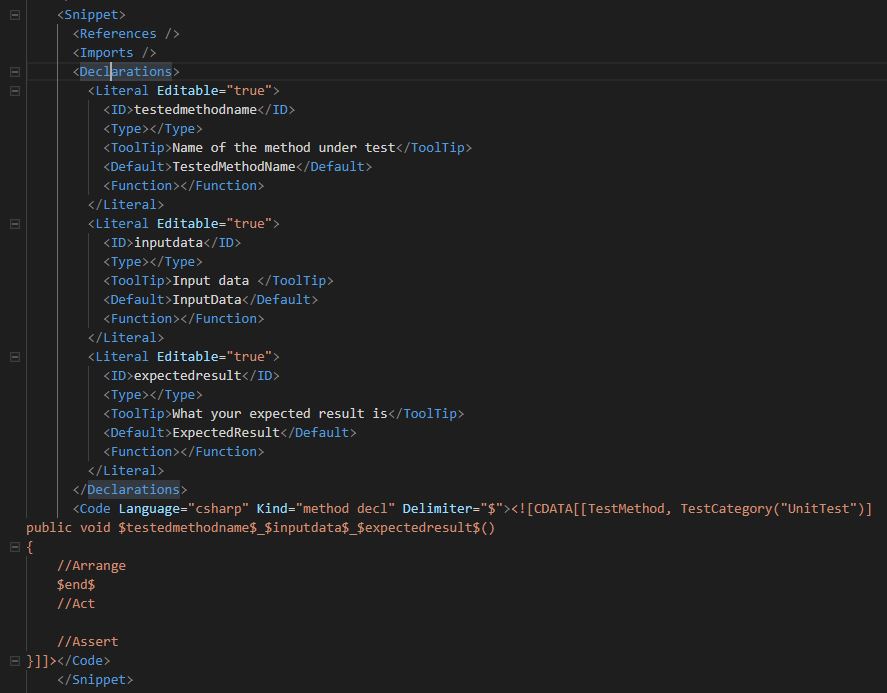
On the other hand, in Snippet section, we defined the three parts for the name of our test as “testmethodname”, “inputdata” and “expectedresult”. We can add a tool tip for each part. Finally, we write the code part, where we compose the code that we want to show in Visual Studio. We use the three variables defined in Declarations and the variable $end$ to go there when we press enter.
To use your snippet you only have to save this snippet with extension *.snippet in Visual Studio folder:
%USERPROFILE%\Documents\Visual Studio 2017\Code Snippets\Visual C#\My Code Snippets\
Now you can use your snippet in Visual Studio (reset Visual Studio is not required).
If you want more information about snippet you can go here: https://msdn.microsoft.com/en-us/library/ms165394.aspx.
The original idea of this snippet comes from this Pluralsight course, which I strongly recommend: Writing Highly Maintainable Unit Tests